For decades condenser microphones have been the staple for high-quality recording and live sound assignments. Unfortunately, not everyone can afford to own a good one. Well that's about to change. I've written this article so that anyone who wants a great condenser mic (or those who just want more of them) can have their wish. For around $20 (US) anyone can build an extremely accurate, life-like condenser microphone. DO NOT let the cost fool you, this mic's frighteningly good performance will blow your mind -and it's easy to build!
This microphone is largely based on a posting I found on the internet showing how to modify Realistic (Radio Shack) PZMs for better performance. I have simply finished the design so people can build a complete mic from scratch. After making a pair of these, I was shocked to find out how amazing they sound. In fact, these little buggers have become my first choice for capturing unhyped, totally natural stereo images, beating-out pairs of choice small and large-diaphragm condensers, and some nice ribbons too!
There are several good points worth a quick mention regarding this microphone:
Firstly, it uses an extremely simple circuit with very few components. As such there's not much stuff in it to screw up the sound. In audio design simple is generally better, and this is the epitome of simplicity.
Secondly, because it is such a simple circuit, it is very easy to build, even if you have no previous electronics building experience. With moderate care and attention anyone can easily build a pair of these mics in an afternoon.
Thirdly, this mic uses a proprietary, portable power supply instead of phantom power. This makes it a great choice for location recording, binaural nature recordings, or anyone forced to rely on dynamic mics because their gear lacks phantom power capability.
Lastly, because this mic uses a tiny 6-mm diaphragm, it has incredibly fast impulse response, which essentially means that its sound reproduction is extremely accurate and life-like. This factor has contributed to the recent popularity of ultra-small-diaphragm condensers. Larger diaphragms (even those used in traditional, high-quality small-diaphragm pencil mics) simply cannot reproduce this kind of accuracy. Recording with a pair these mics sounds just like being there!
Enough rambling-let's get started.
Circuit components
(1) Panasonic WM-66AY Omnidirectional Microphone Cartridge (available from Digi-Key at 800-344-4539, part # P9959- ND). This capsule is a high-quality back electret type with a frequency response that is ruler flat from 20Hz to 20kHz. It contains an internal FET impedance converter making an external FET unnecessary.
- 1000 pF ceramic disc capacitor
- 10uF mylar or metalized polypropylene capacitor (DO NOT substitute an electrolytic!)
(1) .2Kohm 1% metal-film resistor
(1) 9-volt battery terminal w/leads
(1) 9-volt alkaline battery
Insulated copper wire
Hardware:
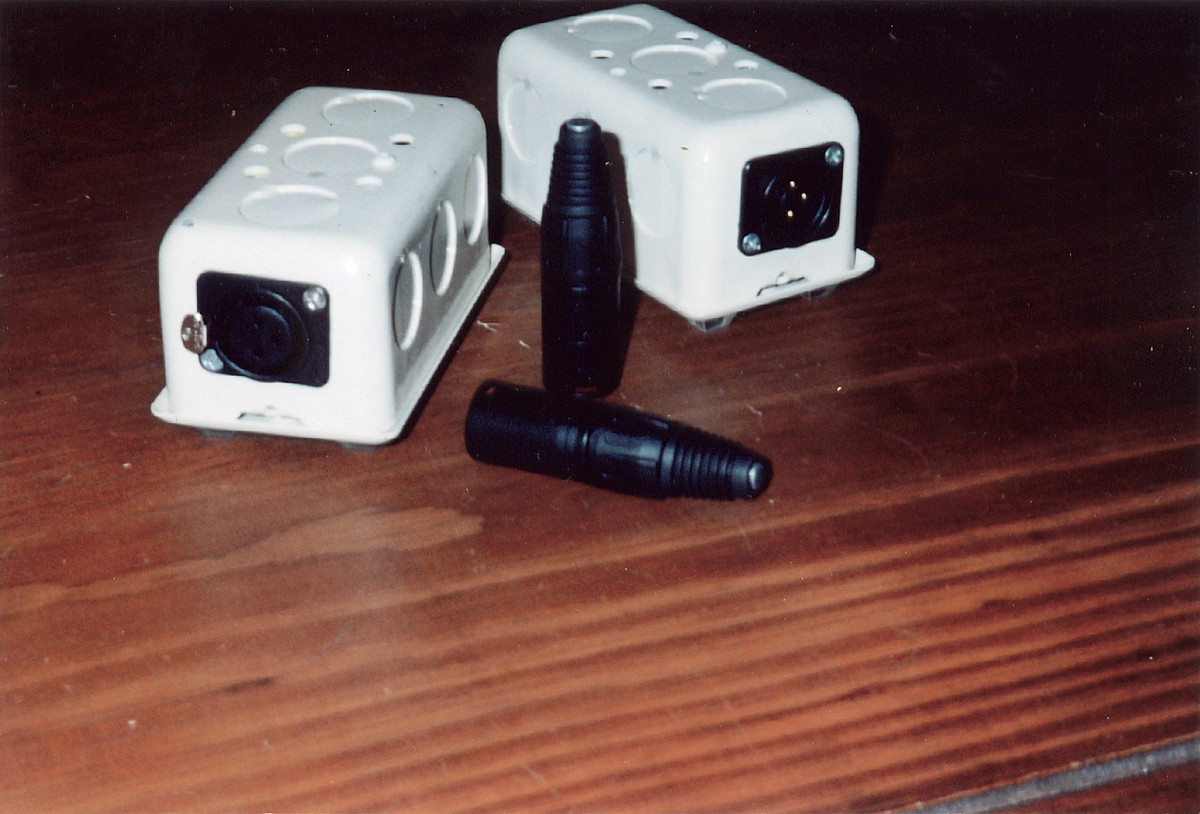
(1) Metal enclosure for the power supply (important for proper grounding)
(1) 9-volt battery mount (clip types can be purchased at Radio Shack or you can use industrial velcro, etc...)
- Panel-mount male XLR connector
- Panel-mount female XLR connector
(1) Male XLR cable connector (for the mic output to PSU)
(4) Rubber feet (not necessary, but I like them for the bottom of the PSU!)
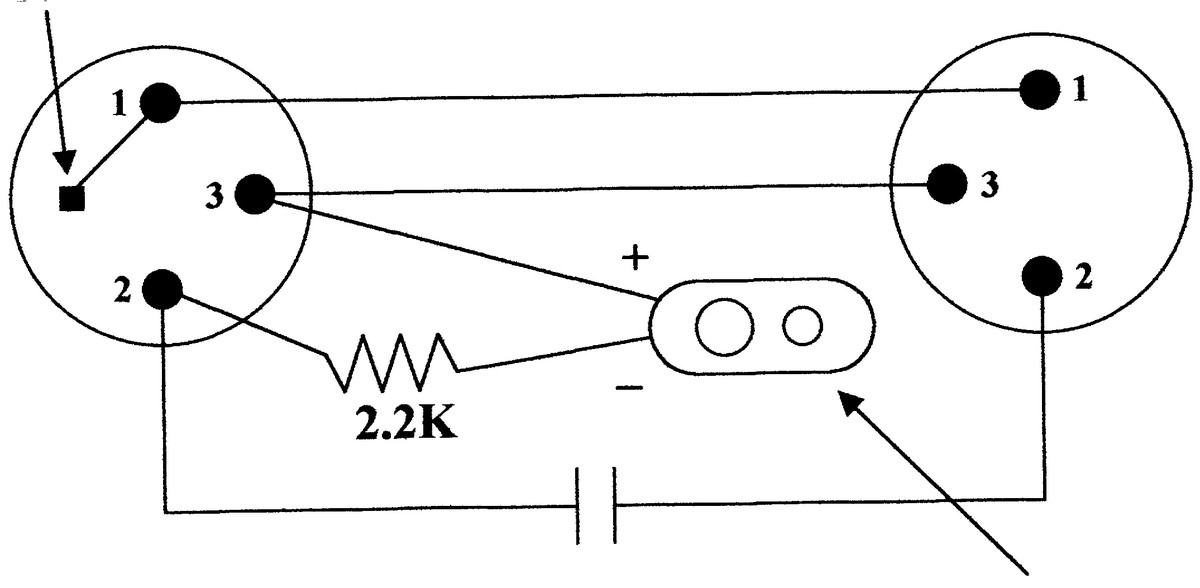
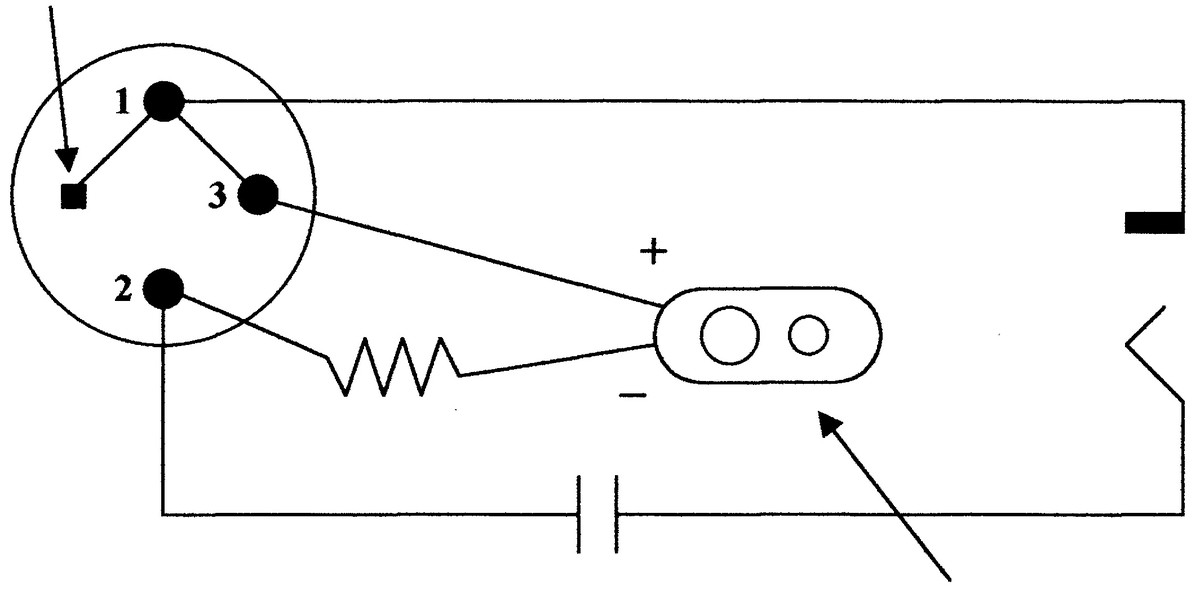
This project consists of two main parts: Fig. 1 — the microphone, and Fig. 2 — the power supply. Fig. 2a is power supply used when driving a balanced input. This is the one most people will want to build. When using it to drive an 1/8" unbalanced mic input (such as those on many cassette and
mini-disc multitracks), simply use an XLR female to 1/8" male adapter cable connecting pin 2 to tip and pins 1 and 3 to sleeve. If you are certain that you will never want to drive a balanced input, you can opt for the supply shown in Fig. 2b designed for use with unbalanced inputs only.
You may notice that there is no "power" switch on the power supply diagrams. This is because the battery will only drain when the mic is plugged in. Each time you finish using the mic, simply unplug it from the supply. There is no need to remove the battery.
Construction tips:
When building the circuit make sure to shrinkwrap all bare leads to prevent the possibility of shorting against the chassis or other leads. If shorting occurs, your mic won't work. Shrinkwrap is available from any electronic supply store.
After you connect the wire leads to the mic cartridge seal the entire back of the cartridge with non-conductive epoxy making sure to overlap a touch where the back meets the sides. This seal...
